Tailwind CSS is a new approach to working with CSS in websites, and I've created two new skeletons for Sculpin users who want to incorporate Tailwind into their sites.
Tailwind relies on utility classes to individually declare the appearance of each part of your website. It's similar, in some ways, to using HTML "style" attributes. But, because it is very strict in what options are available, it guides you toward having consistent styling that is easy to manage across your site.
If you find yourself reaching for CSS classes, you can extract your existing Tailwind implementations into reusable styling components. It's advised to only do this when you spot clear abstractions that will help enhance your website - after all, one goal of the utility-first approach to CSS is to prevent premature abstraction.
For users who don't want to use Tailwind or the more-complex build
process that comes with that approach, you may want to look into the
sculpin init command. It will start you with a blank slate to build
up from.
Both of the Tailwind skeletons require that yarn is installed in
addition to composer, but the sculpin init variation only requires
composer.
The Blog
The first skeleton is, of course, a Blog skeleton. This works similarly to the existing Bootstrap-based Sculpin blog skeleton, but provides a default layout that uses Tailwind utility classes to deliver a Desktop and Mobile-friendly blog experience.
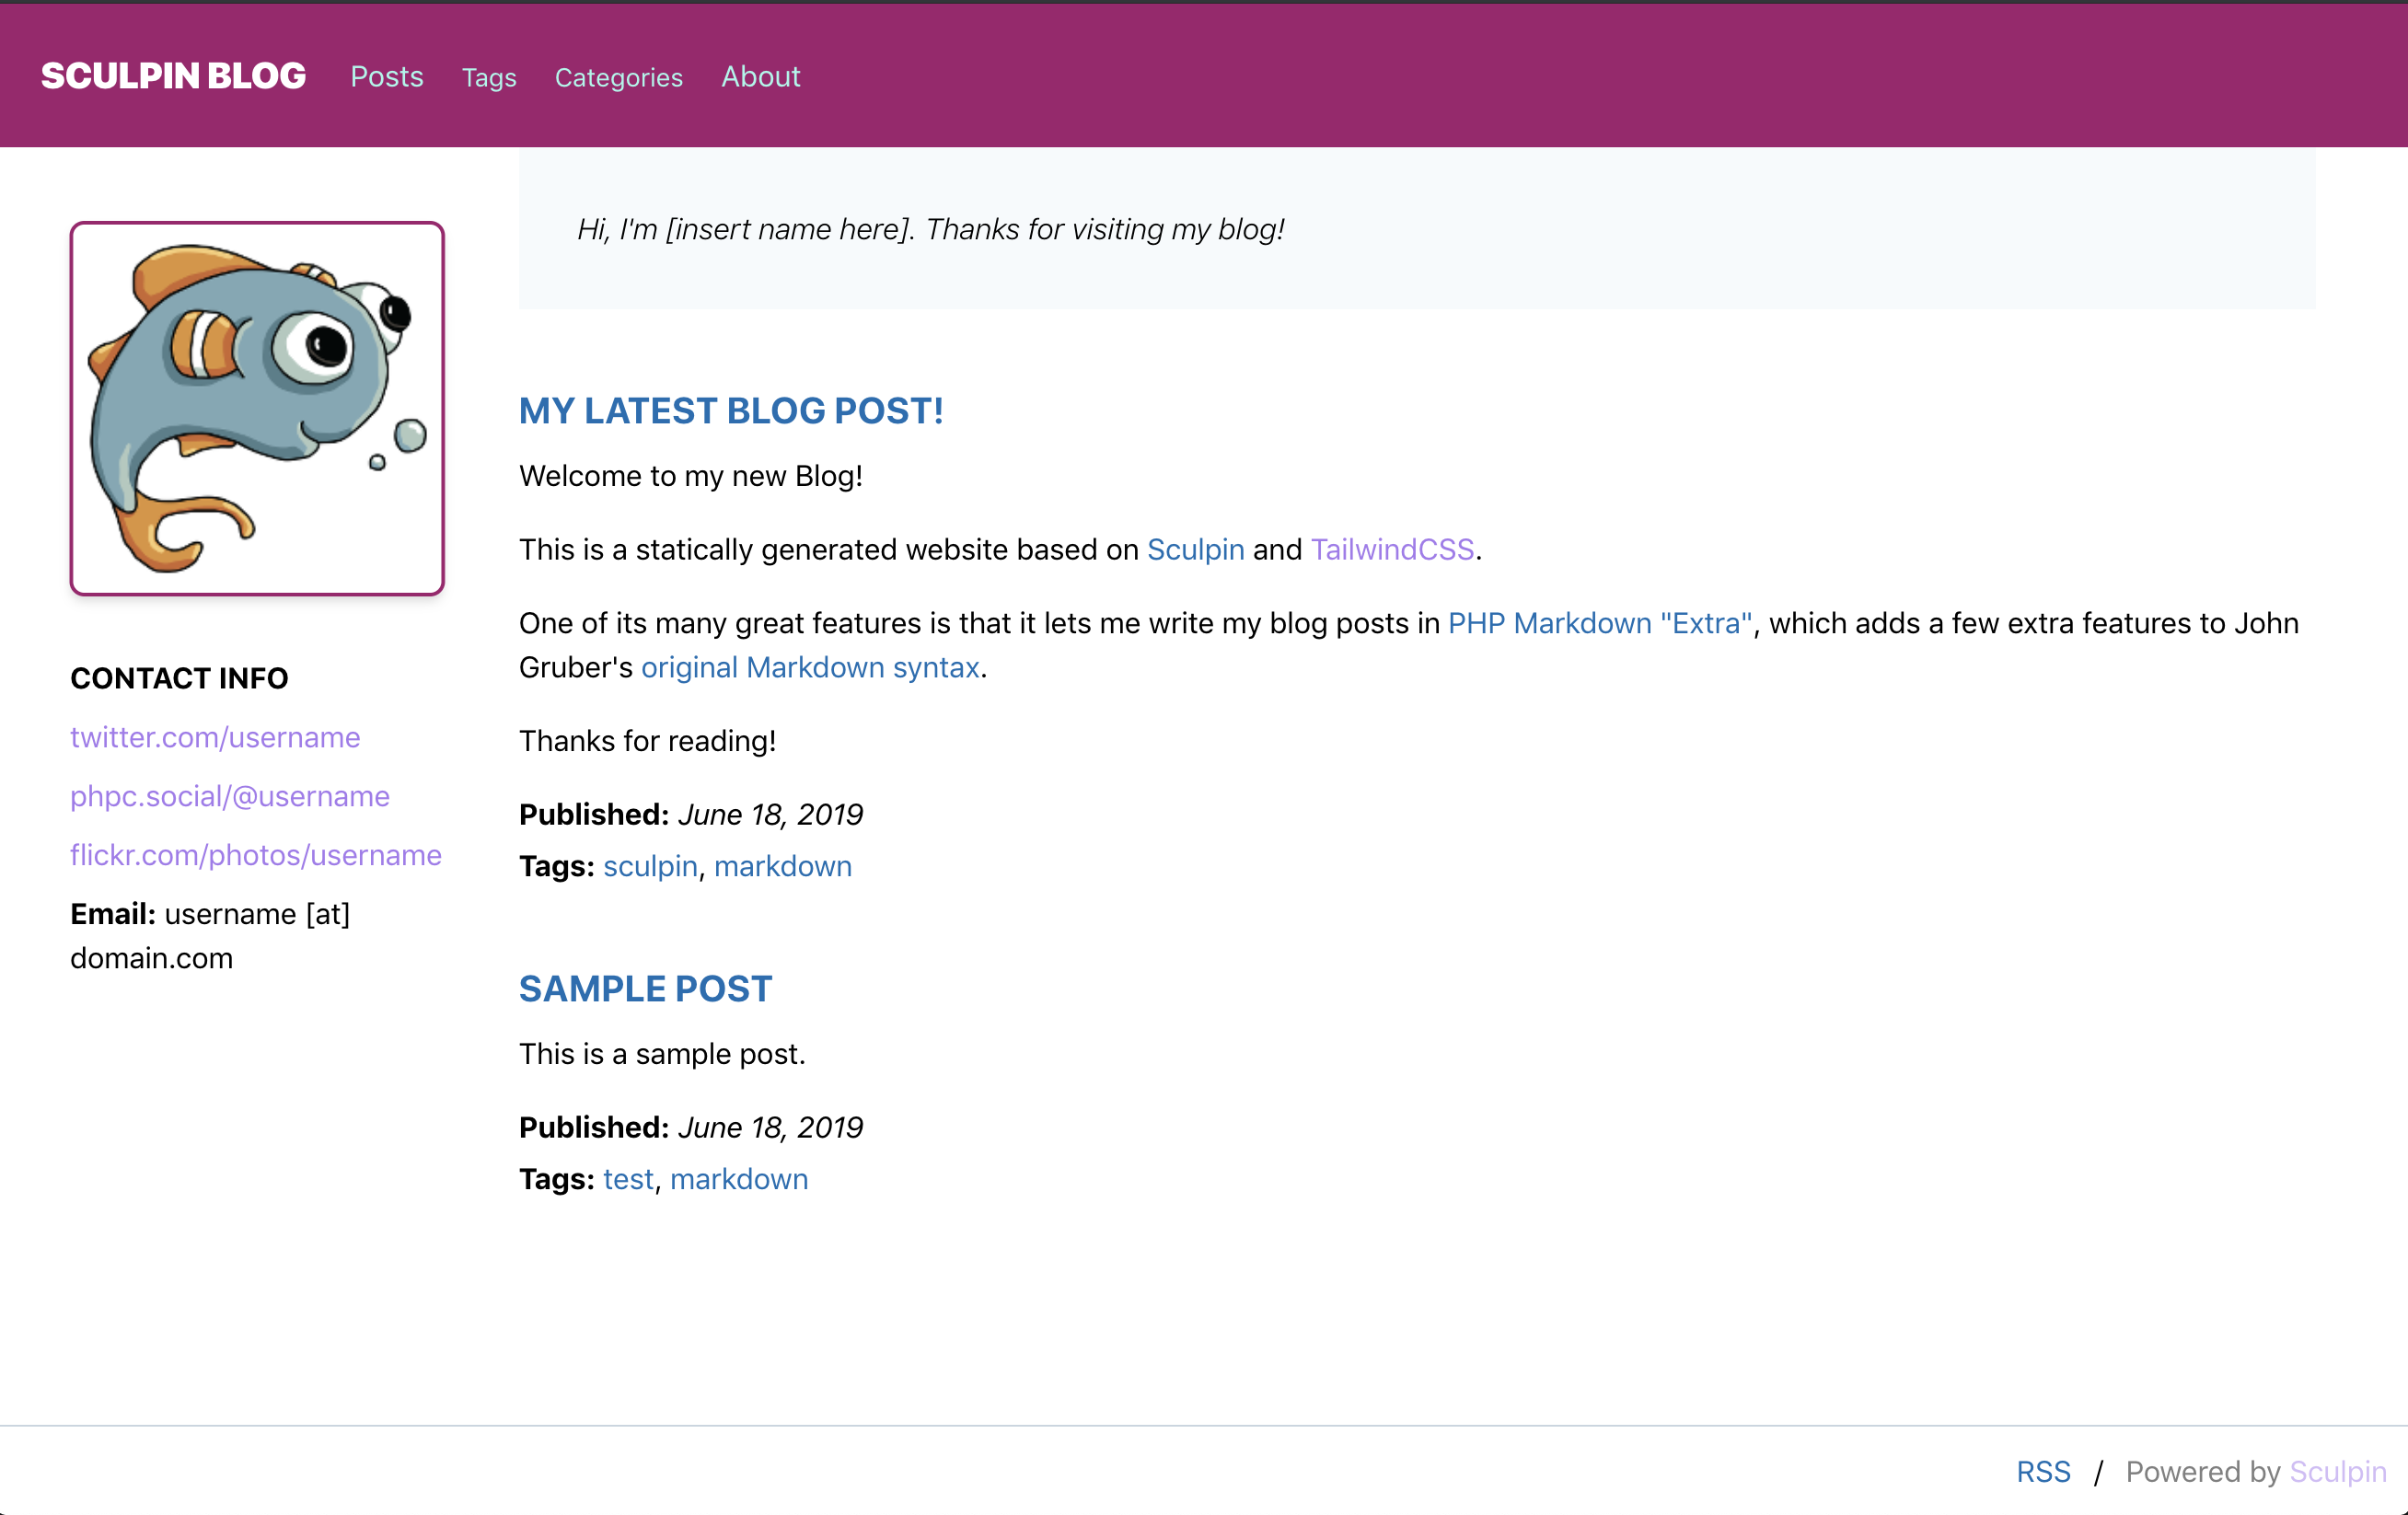
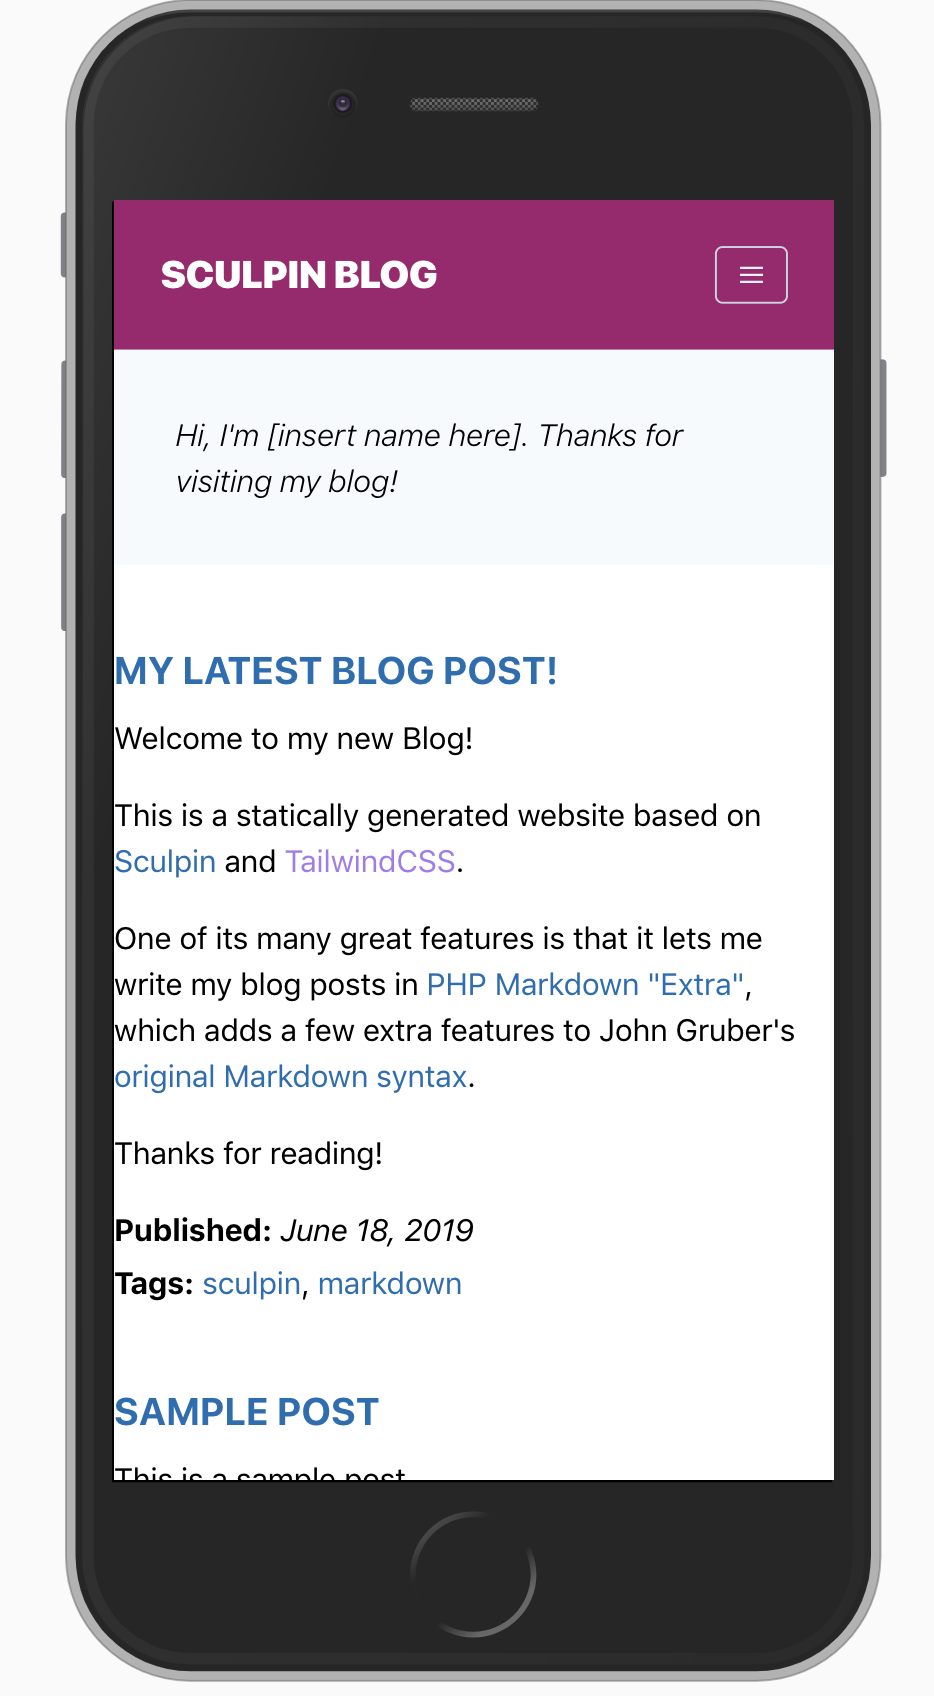
There's a demo site if you want to give it a spin, and take a look at the GitHub repository if you want to see how things are tied together.
The Product/Company Landing Page
Static site generators are great for more than just blogs. Corporate and product websites are prime candidates for statically generated content!
With that in mind, I've created a bit of a tongue-in-cheek skeleton that pretends to be a Product landing page. Again, it is Desktop and Mobile-friendly, and ready for you to get into the Tailwind assets and start tailoring it to your product or organization.


Check out the demo site and visit the GitHub repository:
How To Get Started
You have two ways to get started with these skeletons. There's the
original method of using Composer's create-project command, and then
there's the extra-crispy method of GitHub's new "template repositories"
feature.
Composer
The command for getting started with Composer looks like:
composer create-project beryllium/sculpin-tailwind-blog-skeleton myblog
Or, for a landing page:
composer create-project beryllium/sculpin-tailwind-landing-skeleton myproduct
Template Repository
To be honest, I haven't tried out the template repository approach yet, but I did set the flag on both of these repos. This makes a button show up directly in the GitHub interface to get rolling with a repository based on the skeleton.
You click the button, give your new repository a name, and then clone it locally like any of your other GitHub repositories.
With any luck, this will make it easier to spin up new Sculpin projects.
Launching The Skeletons
Once you've got the code checked out locally, you can install dependencies:
composer install
yarn install
Then, the tricky part part is that we need to have two "watch" processes running at the same time. One of them is the Sculpin watch process, which monitors the filesystem for changes to your HTML or Markdown. The second one is the 'Webpack Encore' watch process, which detects changes to the SCSS files used by Tailwind to configure your project's settings and appearance.
In one terminal window, you can start the Sculpin watch command like so:
vendor/bin/sculpin generate --watch --server
In a second terminal window, start the Encore watch command:
yarn encore dev --watch
Once they are running, you should be able to load the skeleton site at http://localhost:8000/
The shortcut "Ctrl-C" is usually the best way to exit these process when you're done.
If you close the terminal window without exiting the processes, depending on your operating system's settings, it might accidentally leave them running invisibly in the background. If such a situation arises, you can use some useful Linux/Unix commands to locate and terminate the processes:
ps auwx | grep sculpin

# Now look for the "PID", or Process ID, of the Sculpin process.
# You can use it to terminate the process, like this example of PID 1234:

kill -9 1234
You can do the same for Encore, if necessary.
Working With The Skeletons
The files that make up these skeletons are located inside the source/
folder.
To edit the layout of the blog skeleton type, modify the file
source/_layouts/default.html. To change the layout of an individual
blog post page, edit the file source/_views/post.html. And to add new
blog posts or edit blog posts, create files in the source/_posts/
folder. I recommend following the naming convention of
"Year-Month-Day-SlugText.md", as it makes posts easier to find when
listing the contents of large blogs.
To edit the layout of the landing page skeleton, modify the file
source/_views/default.html.twig. The top part of the main page is
dictated by the source/_views/landing.html.twig file, which pulls in
variables from the YAML front-matter of the source/index.html file as
well as variables stored in app/config/sculpin_site.yml.
The rest of the landing page content is stored in source/index.html.
See the main Sculpin documentation for more information about how these files work together, as well as tips on deploying your Sculpin website.
Tailwind CSS documentation can be found at the Tailwind website.
Sculpin uses the Twig templating engine, which has powerful functionality to help you build amazing websites. The documentation is available on the Twig website.